
Moldmaking can sometimes require finesse. In order to create a usable die or mold, you need both precision and a quality surface finish. As we all know, there is an art to things like feeds and speeds; moldmaking will put that to the test.
Consider the idea of design for manufacturability. When designing a part to be machined, you need to consider how you’re going to hold the part, how repeatable you need things to be, and what the sequence of operations will be to create your part. If you’re making a mold, not only do you need to consider all of these elements, but you also need to remember that your part is a tool.
Designing a Mold
In molding, you are going to use the final part as a tool for injecting material (typically a form of plastic) and creating a final product in high quantities. That means you need to design the mold with specific features in order to behave in the manner necessary for production.
Avoiding nooks and crannies unless they are essential features can save a lot of pain and suffering while creating molded parts. Those tiny spaces often have a hard time getting filled with the molding material, which means parts come out weak or incomplete. Avoiding these kinds of features alleviates the concern.
When material is shot into your mold, more often than not, there is a certain window of time before the part begins to cure and solidify. If the material doesn’t cure evenly, the part can have unexpected weak spots or break apart when the mold releases. This is especially apparent if you’re dealing with thin channels in your mold. If an area has thin channels, specifically in the runners and gates of a mold, it’s important to be sure that your surface finish allows for high flow in order to fill those spaces.
It’s All About Surface Finish
One of the most important things to consider when you’re looking to create a mold is surface finish - the surface finish of your mold will always affect the final parts. One of the determining factors with surface finish, when it comes to mold making, really depends on the final material that will be used in the mold, as well as the tolerances that the end user requires. For instance materials like silicon require mirror finishes to work properly… to the point where you can’t even touch the finished piece because the residue and oils from your fingers can cause issues.
Sometimes, you want your mold to be textured. For example, if you’re making a mold of a medical part, like an endoscope, which a surgeon needs to hold with gloves, you need to develop a uniform texture for gripping.
Medical utensils often need to have a highly tactile capability. Grip is part of that, but something as basic as how the tool feels in your hand is important. When a surgeon is doing incredibly delicate work, they need to be able to not only hold their tools properly, but the tool should also feel comfortable in their hand.
The feel of a part can also play an important role with the marketing of a part. Within the automotive industry, a lot of importance is placed on the feel of a vehicle’s interface, which goes back to how the surface finish was created in the mold for those parts.
A sub-par surface finish can also cause issues with splay, sometimes called “silver streaks.” This issue has the appearance of silver scratches on the finished part. Splay is caused by minuscule gas bubbles being dragged across the surface of the part when the mold cavity is filled.
When a material is heated before being injected into a mold, there is often moisture in that material. As it’s heated, this moisture turns to steam as the material is heated, and the result is tiny gas bubbles in your injection material.
As your part is curing in the mold, these gas bubbles work their way to the surface and cause splay. While this issue is clearly a cosmetic problem, it can also weaken a molded part.
Splay can be prevented by using hygroscopic materials and checking that a material is dried completely, but sometimes splay can still present a challenge. This is where quality surface finish comes into play. Vents are designed to allow the air in a mold to escape as it is filled, but with the right surface finish, those gas bubbles can be ushered to vents as well - reducing splay
How to Get Better Surface Finishes with Your Mill
Knowing the geometry of your tools and how they relate to your toolpaths and mold geometries is important. Oftentimes, software can help you out with this challenge, but the key is making sure your CAM knows your tools. A properly set up tool library can not only save you piles of time, but it can also help your software do more of the heavy lifting. There are also a number of verification programs that you can use to double-check your CAM.
Choosing a cutting technique for your situation can really affect your surface finish, as well. In the molding industry, much like the aerospace and automotive industries, organic surfaces are very common. Constant scallop and adaptive toolpath generation are options to keep in mind when you are CAMing up a mold.
When it comes to the machine itself, to achieve the best surface finish possible for mold making consider:
- Maintenance and upkeep of your machine. Your machine should be running like a well-oiled… machine. Without proper upkeep and cleaning, grit can get into the nooks and crannies of your ways, ball screws, and many other areas, which can cause hard-to-find vibrations and slop. Vibration is a quick way to kill a good surface finish.
- A good, rigid setup. If you're cutting with a tiny cutter, with tiny stepovers, rigidity of your setup is vital to not only reduce vibration but also save your tool from breakage. This rigidity goes far beyond just your machine itself – workholding, toolholding, tool stick-out and runout call all cause issues with rigidity, leading to crummy surface finish.
For the best possible surface finishes on your mold, when it comes to your program and the toolpaths that you CAM up, consider:
- Reducing your stepover to as little as possible, while still taking a chip (See #3). If time isn’t an issue, a stepover of 10-15% is ideal.
- Paying attention to where your chips will be going. Watch the cutter simulations and determine where your chips will be flying, because cutting over chips is a quick way to ruin a good finish. If you might be cutting over chips, consider changing your toolpaths or use flood coolant to keep things clear.
- Even though you’re using a reduced stepover, make sure you are still taking a chip. If you’re not making chips, the cutter will be just rubbing on your part, which can lead to odd tool marks and a bad surface finish.
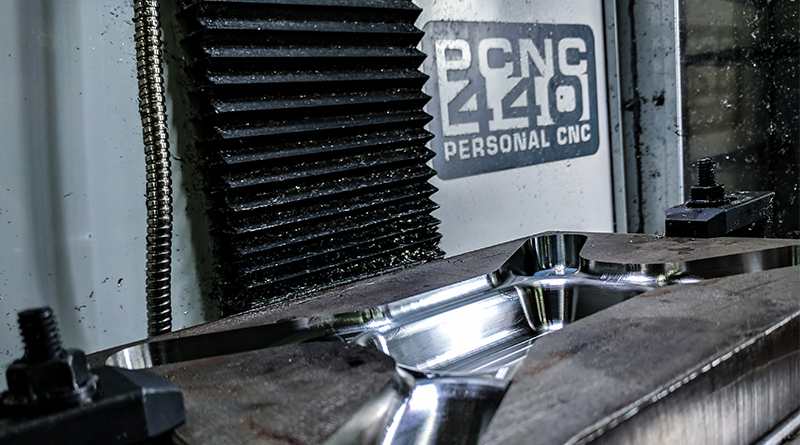
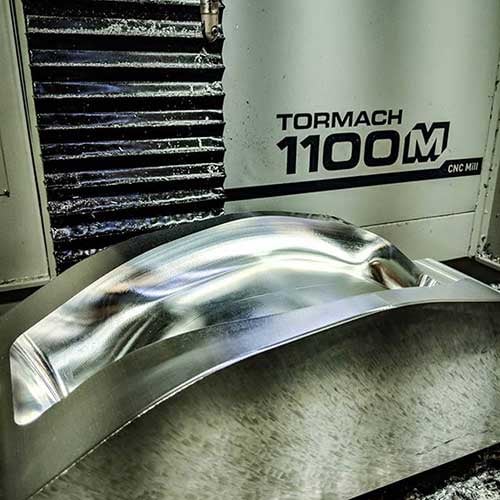
With the right coordination of programming and tooling, you can start making molds to fit your business or hobby needs. When dialed in the right way, Tormach machines are capable of creating some incredible surface finishes right off the machine… even on our smallest mill, the PCNC 440!