
Vacuum workholding is great for securing large, thin parts which otherwise would be difficult to hold down. It also holds the material in a relatively free state and can be a great way to machine flat parts. The DATRON Neo was the first machine we had with a dedicated vacuum table, and now that we’ve had Tormach’s 24R in the shop for a while we’re finally getting used to the workflows of a vacuum table. We’ve compiled a list of tips and tricks for reliably using your vacuum table, so let’s jump right in!
Downcut Tooling
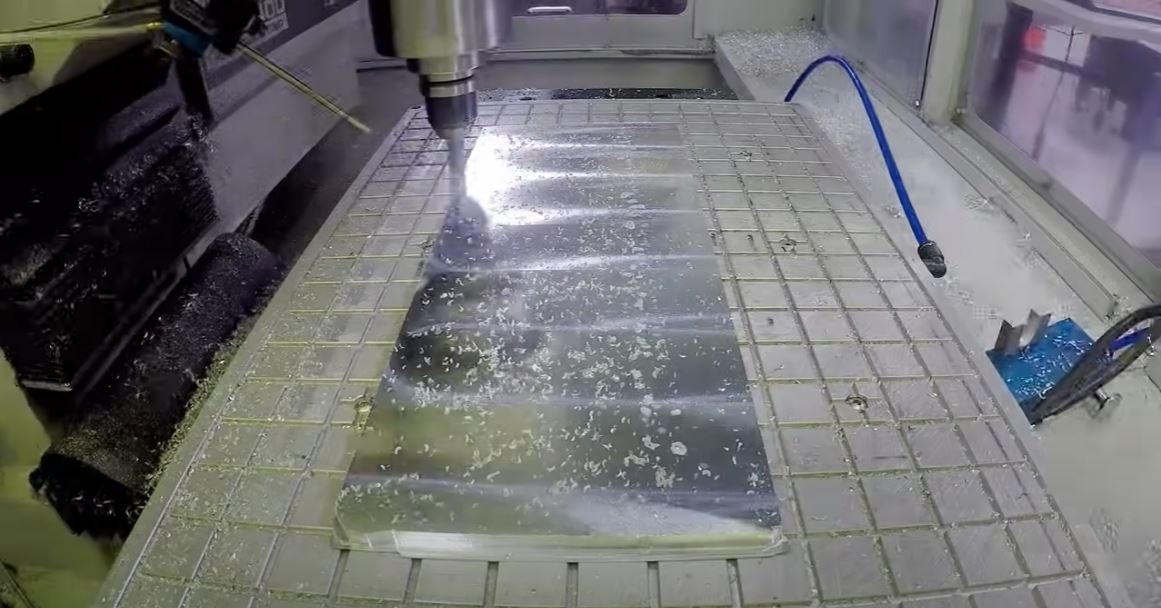
An important thing to consider when using vacuum workholding is the force involved in the cut. We’ve found that vacuum systems are great at resisting lateral forces (in the X and Y directions on your table), but even small axial lifting forces in Z can create a gap between the table and part and cause a loss in vacuum. While making our acrylic fixture plate savers we found that trying to push the acrylic sheet around on the table was nearly impossible by hand, but using one finger to apply a small lifting force at the edge or corner of the sheet would pop it right off of the table.
A great way to minimize these axial forces is to use downcut tooling instead of upcut or compression cutters. A standard upcut endmill will try to pull the part up off of the table as it cuts, making it easier to lose vacuum pressure and throw a part. Downcut tooling applies axial forces in the opposite direction, pushing the part into the table instead of pulling it up.
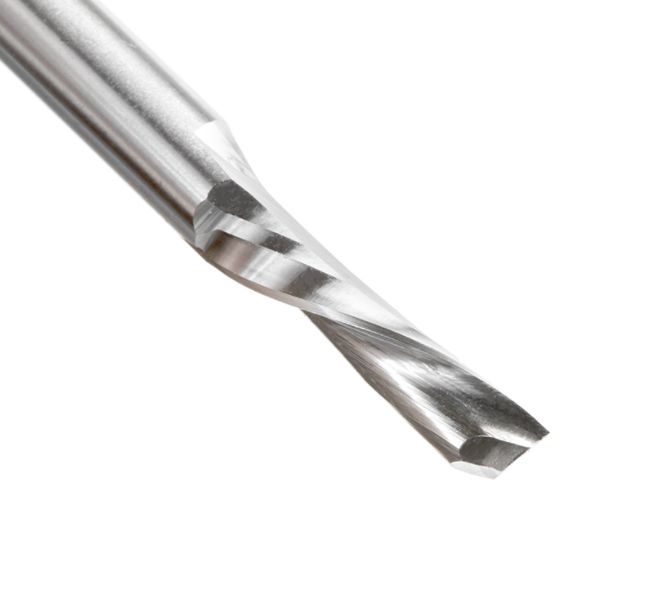
A downcut single flute endmill. Photo courtesy of Amana Tool.
Small Tools
Using downcut tooling solves the problem of axial forces, but all else the same switching between these and upcut tooling has little effect on your radial forces. Vacuum tables may have much better holding power in the lateral directions, but being too ambitious with your speeds and feeds can still cause the workholding to fail due to forces in this direction. Using smaller diameter tooling will impart less radial cutting forces on the part making your setup less prone to failure (that’s not to say just use the smallest tool possible – but if you’re having trouble getting a vacuum table to work try downsizing your cutter a bit!)
Surface Area
Much like our Superglue Workholding technique, surface area (specifically more surface area) is critical to strong vacuum workholding. The more surface area you have available the more force the vacuum pump can apply to the part, meaning more holding power. It’s also important to not only consider the surface area of the stock but the surface area of the finished part (for example, if cutting a large hole in the center of your part it’s important to be aware of the reduced surface area and therefore holding power on cuts after the hole is machined).
Fast & Light Cuts
A technique often used on smaller hobby routers and desktop mills is to take small, light passes very quickly to maximize MRR. This is because rigidity is often the limiting factor of these hobbyist machines and taking lighter cuts imparts much lower forces on the machine, therefore each cut requires less rigidity than a heavier, slower cut at the same MRR would require. Since every action has an equal and opposite reaction, not only are these forces acting on the machine but also on the part. Employing this same technique to vacuum workholding means that cutting forces are minimized and your part is less likely to come loose while cutting.
Add Clamps When Possible
Vacuum workholding can take a variety of different techniques to get right – and as such it can be pretty difficult to develop a reliable process that works every time. We have been using the 24R’s vacuum table in addition to one of our SMW fixture plates and a DATRON VacuCard to make our acrylic fixture plate savers recently, and this combination has been fantastic. The ability to add and remove fixture plate plugs where vacuum is needed is a handy trick, but what really makes this setup shine is the ability to use clamps or fasteners in addition to the vacuum system. The addition of tapped fixturing holes in the surface being used as a vacuum table means that clamps can be added to the edges of the material, and even adding just one to your setup helps a ton by limiting any edge lift. The use of some kind of directional vacuum surface like the VacuCard (our next tip!) also covers the fixturing holes not in use so no vacuum pressure is lost.
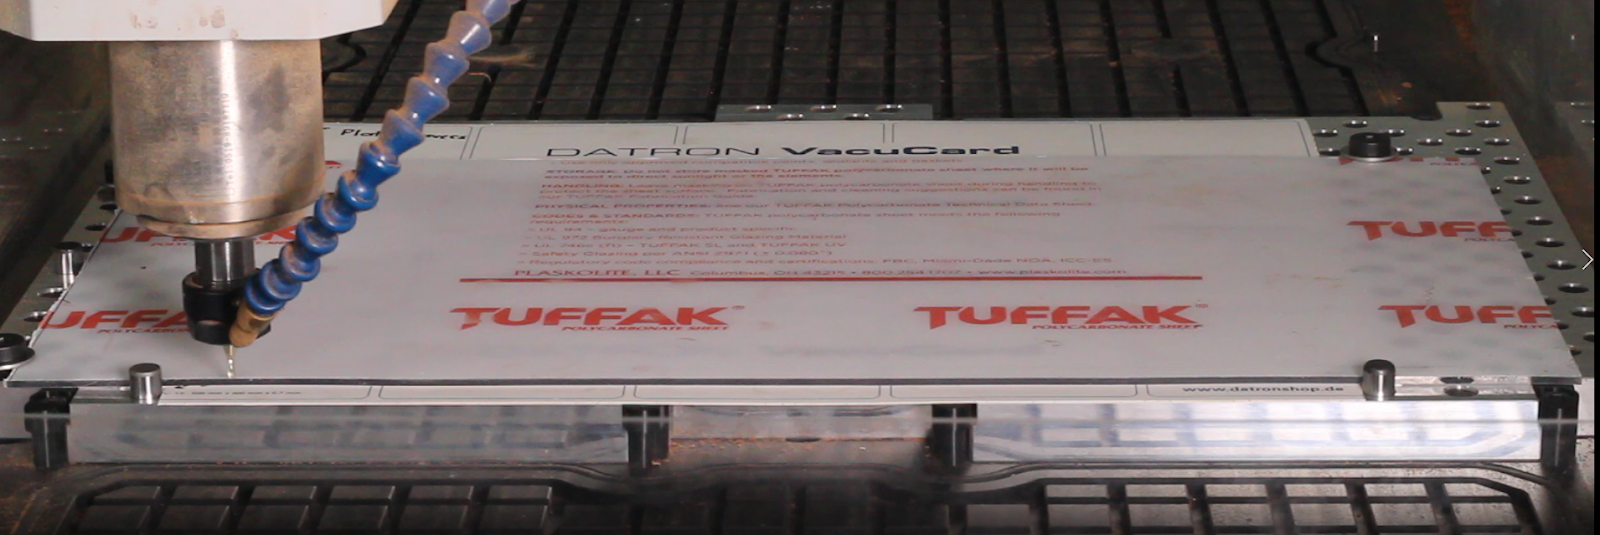
Using a VacuCard on top of an SMW Fixture Plate alongside the 24R’s vacuum pump has proven to be a reliable workflow. Note the screws applying extra holding force along the edges of the material.
Directional Vacuum Systems
We were introduced to directional vacuum systems during our loan of DATRON’s Neo router which uses their VacuCard system in tandem with the vacuum table on the machine. A directional vacuum works sort of like a check valve – fluid (in this case air) can pass through the surface in one direction but not easily in the other. This allows the vacuum pump to pull air in through the top of the VacuCard to draw a vacuum while still maintaining that vacuum beneath the part.
So why does this matter? A few reasons: first of all a sheet like this often eliminates the need for placing rubber gaskets around your part which can be a hassle to change in and out. It also gives you more room for error when setting your z-height – machining a hole through your part won’t cause you to lose vacuum pressure like a bare vacuum table. Finally, these kinds of directional vacuums provide a layer of protection for the vacuum table itself and prevent you from machining into the vacuum grid, which can be a pricy mistake to make.
We’ve recently been using Trimaco X-Board on our 24R, and it’s a great alternative to DATRON’s VacuCard! This and other brands of Ram Board are inexpensive and easy to cut to size, making them a great alternative for hobbyists. They are also readily available at Home Depot and other hardware stores.
This blog was guest written by John Saunders of NYC CNC and Saunders Machine Works.